Free Shipping to the lower 48 on all freeze dryers!

Please expect up to 4-6 weeks for your order to ship.
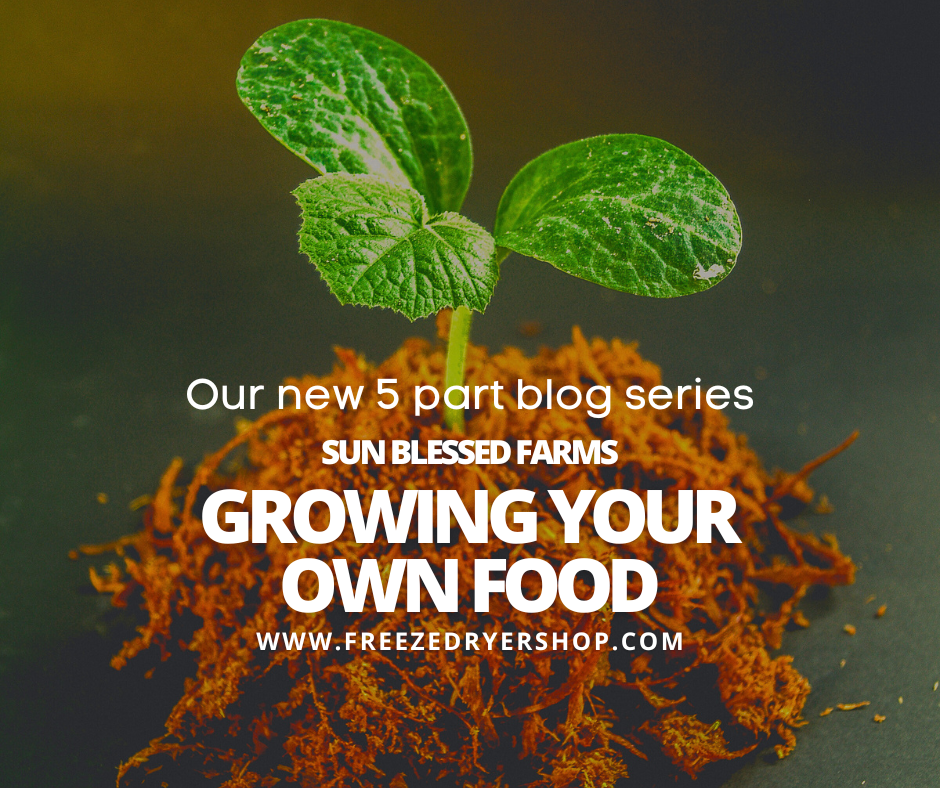
Growing Your Own Food Part 3
Starting Your Seedlings
Welcome to the third installment of our 5-part blog series, "Growing Your Own Food." In this edition, we'll delve into the exciting world of starting seedlings—your gateway to nurturing healthy, productive plants for your garden. As you embark on this journey, you'll discover essential insights and techniques that will set you on the path to a thriving garden.
In this blog, we'll cover the following five critical aspects of seedling starting:
- Selecting the Right Seeds: We'll guide you on how to choose seeds tailored to your garden's unique conditions, including climate, soil type, and your preferences for fruits, vegetables, or herbs.
- Essential Seedling Equipment: Explore the tools and supplies necessary for successful seedling cultivation, from seed trays and potting mix to the importance of grow lights and heat mats.
- Germination Techniques: Learn about a variety of germination methods, such as seed soaking, scarification, and stratification, and gain insights into when and how to apply each technique effectively.
- Nurturing Seedlings: Discover the art of providing your young seedlings with the care and attention they need, including proper watering, temperature control, and the importance of thinning for optimal growth.
- Transplanting Seedlings: We'll provide expert advice on when and how to transplant your healthy seedlings into your garden, ensuring a seamless transition and setting the stage for robust growth.
With these key points in mind, you'll be well-equipped to embark on the journey of starting seedlings with confidence and success. Whether you're a seasoned gardener or just getting started, join us as we unlock the secrets to nurturing vibrant, homegrown plants from the very beginning. Let's dig in!
Selecting The Right Seeds:
Selecting the right seeds is the foundational step in the seedling starting process, setting the stage for a flourishing garden. It's crucial to choose seeds that align with your garden's unique characteristics and your culinary or aesthetic preferences. Here are some key considerations:
- Climate and Zone: Begin by understanding your local climate and hardiness zone. Different plants thrive in specific temperature ranges and conditions. Research which plants are well-suited to your zone, ensuring they can withstand your region's average temperatures and frost dates.
- Soil Type: Evaluate your garden's soil type—whether it's sandy, loamy, or clayey. Some plants prefer well-draining soils, while others thrive in moisture-retentive soil. Match your seed choices to your soil conditions for optimal growth.
- Space and Garden Layout: Assess the available space in your garden and its layout. Some plants require ample space to spread out, while others are compact. Plan your garden layout to accommodate each plant's growth habit, ensuring they won't compete for space.
- Crop Variety: Consider the variety of crops you want to grow. Do you prefer fruits, vegetables, herbs, or a combination? Different crops have varying care requirements and growth durations, so choose based on your gardening goals.
- Seed Source: Ensure you obtain high-quality seeds from reputable sources. Reliable seed companies provide seeds that are true to type and have good germination rates. Reading reviews and seeking recommendations can help you identify trustworthy suppliers.
- Heirloom vs. Hybrid: Decide whether you want to grow heirloom or hybrid varieties. Heirlooms offer unique flavors and characteristics and can be saved for future plantings. Hybrids, on the other hand, often exhibit disease resistance and uniformity.
- Succession Planting: Plan for succession planting to extend your harvest throughout the growing season. Select seeds with staggered maturity dates to ensure a continuous supply of fresh produce.
By considering these factors when selecting seeds, you'll be well on your way to a successful seedling starting experience. Tailoring your seed choices to your garden's specific conditions and your preferences will contribute to a bountiful and enjoyable gardening journey.
Essential Seedling Equipment:
Equipping yourself with the right tools and materials is essential for successful seedling starting. Here are some key pieces of equipment you'll need:
- Containers: Choosing the appropriate containers is crucial for seedling development. Consider using seed trays, cell packs, or biodegradable pots. These containers provide sufficient space for roots to grow and make transplanting easier.
- Seed Starting Mix: Seedlings have unique soil requirements. A high-quality seed starting mix provides the ideal balance of nutrients, aeration, and moisture retention. It's typically lighter and finer in texture than garden soil.
- Light Source: Adequate light is vital for strong, healthy seedlings. While natural sunlight is best, supplemental grow lights can be used if natural light is limited. Position lights close to the seedlings to prevent leggy growth.
- Heat Source: Maintaining the right temperature is essential for germination. Consider using a heating mat to provide consistent bottom warmth, promoting quicker and more uniform sprouting.
- Humidity Dome or Plastic Wrap: A humidity dome or plastic wrap can create a mini-greenhouse effect, trapping moisture and heat to encourage germination. Once seedlings emerge, gradually reduce humidity to prevent mold.
- Watering Can or Mister: Seedlings are sensitive to overwatering. Use a watering can with a fine rose or a mister to provide a gentle, even spray of water, preventing soil disturbance.
- Labels and Markers: Keeping track of your seedlings is crucial. Use labels or markers to identify each variety, planting date, and any specific notes. This helps you monitor growth and plan for transplanting.
- Fan: Air circulation is vital to prevent diseases and strengthen seedlings. A small fan on low setting can mimic outdoor breezes and improve overall plant health.
- Timer: If you're using grow lights, a timer can automate the lighting schedule, ensuring consistent light exposure for your seedlings.
- Seedling Fertilizer: While seed starting mixes contain some nutrients, seedlings will eventually need additional fertilization. Choose a balanced, water-soluble fertilizer and follow recommended application rates.
Having these essential tools and materials in place will set you up for success when starting your seedlings. With the right equipment, you can create the ideal environment for your seeds to germinate and grow into healthy, robust plants.
Germination Techniques:
Germination is a critical phase in the life of a seed, where it transitions from dormancy to becoming a young, growing plant. Proper germination techniques are essential to ensure a high success rate when starting seedlings. Here, we delve into the key aspects of germination and how to give your seeds the best possible start.
- Seed Selection: It all begins with selecting the right seeds. Ensure you choose high-quality seeds from reputable sources. Check the seed packets for information on ideal germination conditions, planting depth, and any pre-soaking requirements.
- Moisture: Adequate moisture is crucial for germination. Begin by pre-moistening your seed starting mix or propagation medium. Seeds should be planted at the recommended depth and then lightly watered. Covering the containers with a humidity dome or plastic wrap helps retain moisture.
- Temperature: Maintaining the correct temperature is vital for prompt germination. Different plants have varying temperature requirements, so refer to the seed packets for guidance. Using a heating mat can provide consistent bottom heat, speeding up germination.
- Light: Many seeds, especially small ones, don't require light for germination. However, some seeds, like lettuce and petunias, benefit from exposure to light. Check the specific requirements of the seeds you're germinating and adjust your setup accordingly.
- Ventilation: Proper air circulation is essential to prevent mold and damping-off disease. Once seeds have germinated, remove the humidity dome or plastic wrap to allow fresh air to circulate. Consider using a small fan on low to improve air movement.
- Patience: Germination times can vary widely depending on the type of seed, temperature, and moisture levels. Some seeds may sprout in just a few days, while others can take several weeks. Patience is key during this phase.
- Monitoring: Regularly check your seed trays or containers for signs of germination. As soon as seedlings emerge, move them to a well-lit location or under grow lights, ensuring they receive adequate light for healthy growth.
- Transplanting: Once seedlings have developed their first true leaves, they're ready for transplanting into larger containers or directly into your garden. Be gentle during the transplanting process to avoid damaging delicate roots.
- Thinning: In cases where multiple seedlings emerge from a single seed, thin them out to ensure proper spacing and optimal growth. Choose the healthiest-looking seedling to keep and carefully remove the others.
- Hardening Off: Before transplanting seedlings into the garden, they need to acclimate to outdoor conditions. Gradually expose them to increasing amounts of sunlight, wind, and lower temperatures over the course of several days to toughen them up.
By mastering these germination techniques, you'll increase the likelihood of successful seedling starting. Remember that different plant species may have specific requirements, so always refer to seed packets or reliable gardening resources for guidance tailored to your chosen seeds. With patience and attention to detail, you can nurture strong, healthy seedlings ready for the next stage in their journey to becoming productive garden plants.
Nurturing Seedlings:
Nurturing seedlings is a critical phase in their development, setting the foundation for strong, healthy plants that will thrive in your garden. As your seedlings grow, they require careful attention, the right environmental conditions, and proper care practices. In this section, we'll explore how to nurture your seedlings to ensure they reach their full potential.
Light: Adequate light is essential for strong seedling growth. After germination, seedlings need bright, indirect light. If you're growing them indoors, consider using fluorescent grow lights. Position the lights close to the seedlings, adjusting the height as they grow to maintain an ideal distance of 2-4 inches above the plants. Keep the lights on for 14-16 hours each day.
Watering: Proper watering is crucial for healthy seedlings. Seedlings are more vulnerable to overwatering, so it's important to strike the right balance. Water them when the top inch of the soil feels dry to the touch. Use a spray bottle or gentle watering can to avoid disturbing delicate roots. Ensure proper drainage in your seedling containers to prevent waterlogging.
Temperature: Maintain consistent temperatures to promote healthy growth. Most seedlings prefer temperatures between 60°F to 70°F (15°C to 24°C) during the day and slightly cooler temperatures at night. Avoid exposing seedlings to sudden temperature fluctuations, as this can stress them.
Transplanting: As your seedlings grow, they'll outgrow their initial containers. When they have developed a few sets of true leaves and their root systems are well-established, it's time to transplant them into larger pots or directly into the garden. Handle seedlings gently during this process to avoid damaging their roots.
Fertilizing: Once seedlings have their first set of true leaves, they can benefit from a diluted, balanced liquid fertilizer. Use a half-strength solution every 2-4 weeks to provide essential nutrients. Avoid over-fertilizing, as this can lead to nutrient imbalances and damage to the young plants.
Air Circulation: Adequate air circulation is essential to prevent common seedling problems like damping-off disease and mold. Use a small fan set on low to provide gentle air movement around your seedlings. This helps strengthen stems and improves overall plant health.
Pruning: Occasionally, seedlings may develop extra leaves or stems that can hinder their growth. Gently pinch off these unwanted growths to encourage a more robust, streamlined plant structure.
Support: Some seedlings, particularly those that grow tall and leggy, may benefit from additional support. Use small stakes or plant supports to prevent them from flopping over.
Pest and Disease Management: Keep a close eye on your seedlings for any signs of pests or diseases. Early detection and intervention are key to preventing damage. Use organic pest control methods when needed, and promptly remove any affected seedlings to prevent the spread of disease.
Gradual Hardening Off: Before transplanting seedlings outdoors, they need to acclimate to outdoor conditions. Over the course of a week or two, gradually expose them to increasing amounts of sunlight, wind, and lower temperatures. This process, known as "hardening off," helps them adapt to the outdoor environment.
Nurturing seedlings demands attention to detail and consistent care. By providing the right conditions, monitoring their progress, and addressing any issues promptly, you'll foster strong, healthy seedlings that are well-prepared for transplanting into your garden. This nurturing phase sets the stage for a bountiful harvest and a successful gardening season.
Transplanting Seedlings:
Transplanting seedlings is a pivotal step in the journey of growing your own food. It's the moment when your carefully nurtured seedlings make their transition from their indoor or nursery environment to their permanent home in your garden. Properly transplanting seedlings ensures their continued growth and development, setting the stage for a bountiful harvest. In this section, we'll delve into the art of transplanting seedlings, providing essential tips, troubleshooting advice, and valuable insights to help your young plants thrive in their new garden bed.
1. Timing Is Everything:
Transplanting seedlings at the right time is crucial for their success. Wait until they have developed a few sets of true leaves and sturdy stems. This stage typically occurs when seedlings are 2-4 inches tall. Avoid transplanting too early when seedlings are still fragile, as they may struggle to establish themselves.
2. Prepare Your Garden Bed:
Before transplanting, ensure your garden bed is well-prepared. Choose a location that receives the appropriate amount of sunlight for the specific plants you're growing. Clear the area of weeds and debris, and enrich the soil with compost or organic matter to provide essential nutrients for your seedlings.
3. Watering:
Properly hydrating your seedlings before transplanting is crucial. Water them thoroughly a day or two before transplanting to ensure they are well-hydrated. Moist soil makes it easier to remove seedlings from their containers without damaging the roots.
4. Handle Seedlings with Care:
When removing seedlings from their containers, handle them gently to avoid damaging the roots or stems. Support the seedling's root ball by placing your fingers around its base, and use a small tool like a popsicle stick or a plastic spoon to carefully lift it out. Avoid pulling on the delicate stems.
5. Dig Proper Holes:
Prepare holes in your garden bed that are slightly larger than the root balls of your seedlings. This extra space allows the roots to spread out and establish themselves more easily. If you're transplanting multiple seedlings, ensure proper spacing based on the plant's mature size.
6. Transplant Seedlings:
Place each seedling in its designated hole and gently pack the soil around it to eliminate any air pockets. Ensure that the top of the root ball is level with the surrounding soil surface. Water the seedlings immediately after transplanting to settle the soil and provide initial hydration.
7. Mulching:
Applying a layer of mulch around your newly transplanted seedlings helps conserve soil moisture, suppress weeds, and regulate soil temperature. Use organic mulch like straw, compost, or wood chips, leaving a small gap around the base of each seedling to prevent stem rot.
8. Provide Shade and Protection:
For the first few days after transplanting, seedlings may be vulnerable to strong sunlight and wind. Consider using shade cloth or temporary shade structures to shield them from harsh conditions. Additionally, protect your seedlings from pests like birds and insects by using garden netting or row covers.
Troubleshooting:
- Transplant Shock: It's common for seedlings to experience some degree of transplant shock. Symptoms may include wilting or drooping. To minimize shock, transplant on a cloudy day or in the evening, when temperatures are cooler. Water your seedlings thoroughly after transplanting and monitor them closely.
- Overwatering: Avoid overwatering newly transplanted seedlings, as this can lead to root rot. Water deeply but less frequently, allowing the soil to dry slightly between waterings.
- Inadequate Support: Some seedlings, especially tall or top-heavy varieties, may require support to prevent them from falling over in windy conditions. Use stakes or garden supports as needed.
- Pest and Disease Management: Keep a vigilant eye on your transplanted seedlings for signs of pests or diseases. Early intervention is essential to prevent damage. Use organic pest control methods when necessary.
Transplanting seedlings is a pivotal moment in your gardening journey, and with careful attention and proper techniques, you can ensure the successful establishment of your young plants. By following these guidelines, offering protection, and troubleshooting any issues that arise, you'll set the stage for a thriving garden that will yield a bountiful harvest in the months to come.
Conclusion:
Transplanting seedlings is a rewarding step in your gardening journey, where you witness the transition of young plants to their outdoor home. By timing your transplant correctly, preparing the garden bed, handling seedlings with care, and providing adequate protection and support, you can ensure their successful adaptation to their new environment. Troubleshooting common issues and monitoring for pests and diseases are essential for maintaining the health and vitality of your transplants. With patience and nurturing, your garden will flourish, offering a rich harvest of homegrown delights. Happy transplanting!
#GardeningTips #Seedlings #Transplanting #HomeGardening #GreenThumbs #GardenCare #PlantingTips #GardeningSuccess #Harvesting #OrganicGardening
Ready to work with
Sun Blessed Farms LLC?
Let's connect! We’re here to help.
Send us a message and we’ll be in touch.
Or give us a call today at (208) 944-4488
Agency Contact Form
More Marketing Tips, Tricks & Tools
Sun Blessed Farms Expert Advice